
Network changes
The router’s own network is stored as one document, network, in the configuration database:
- the physical ports (up or down, MTU),
- the bonds (members, mode, LACP rate, hash policy, MII interval, MTU),
- the addresses on ports and bonds,
- the default route and static routes on them,
- the host’s DNS servers.
dtvsold writes this into one netplan file, /etc/netplan/90-dtvsol.yaml. The first apply moves
any other netplan files to /etc/netplan/disabled/. The VLANs are not in netplan: the router
creates them at boot. See VLANs.
Look before you change
Section titled “Look before you change”dtvsol netcfg show # the stored configuration, with VLANs and static routesdtvsol netcfg render # the netplan file it writesdtvsol netcfg diff # stored vs the running kernel vs /etc/netplan, and whether an apply is allowedImport the running network
Section titled “Import the running network”On a server that was configured by hand, read the running network (kernel and netplan) into the database once:
dtvsol netcfg import # show what would be stored, key by keydtvsol netcfg render --proposed # the netplan file it would writedtvsol netcfg import --save--save refuses when the netplan file made from it would lose a setting of the current files
(marked LOST in the output). Check those first. --force stores it anyway.
Change and apply from the CLI
Section titled “Change and apply from the CLI”Edit the document. The editor checks the JSON and keeps a configuration version first:
dtvsol config edit networkThen check and apply:
dtvsol netcfg diffdtvsol netcfg apply --try # check the new file with netplan generate onlydtvsol netcfg applyWhat apply does:
- Backs up the netplan directory (with the bond members’ settings and the DNS settings) and saves a configuration version.
- Checks the new file with
netplan generate, then runsnetplan apply. - Compares the kernel with before (addresses, default routes, router advertisements) and lists every difference.
- Waits for your confirm. Without a confirm within 120 seconds, the previous network is put back.
dtvsol netcfg confirm # keep the new networkdtvsol netcfg rollback # put the previous one back nowAn apply is refused when it would take away the address your SSH session or the API is
using. --force applies it anyway.
Only one change can wait for its confirm at a time.
Change and apply from the monitor
Section titled “Change and apply from the monitor”Admins can change ports and bonds on Settings → Interfaces in the monitor:
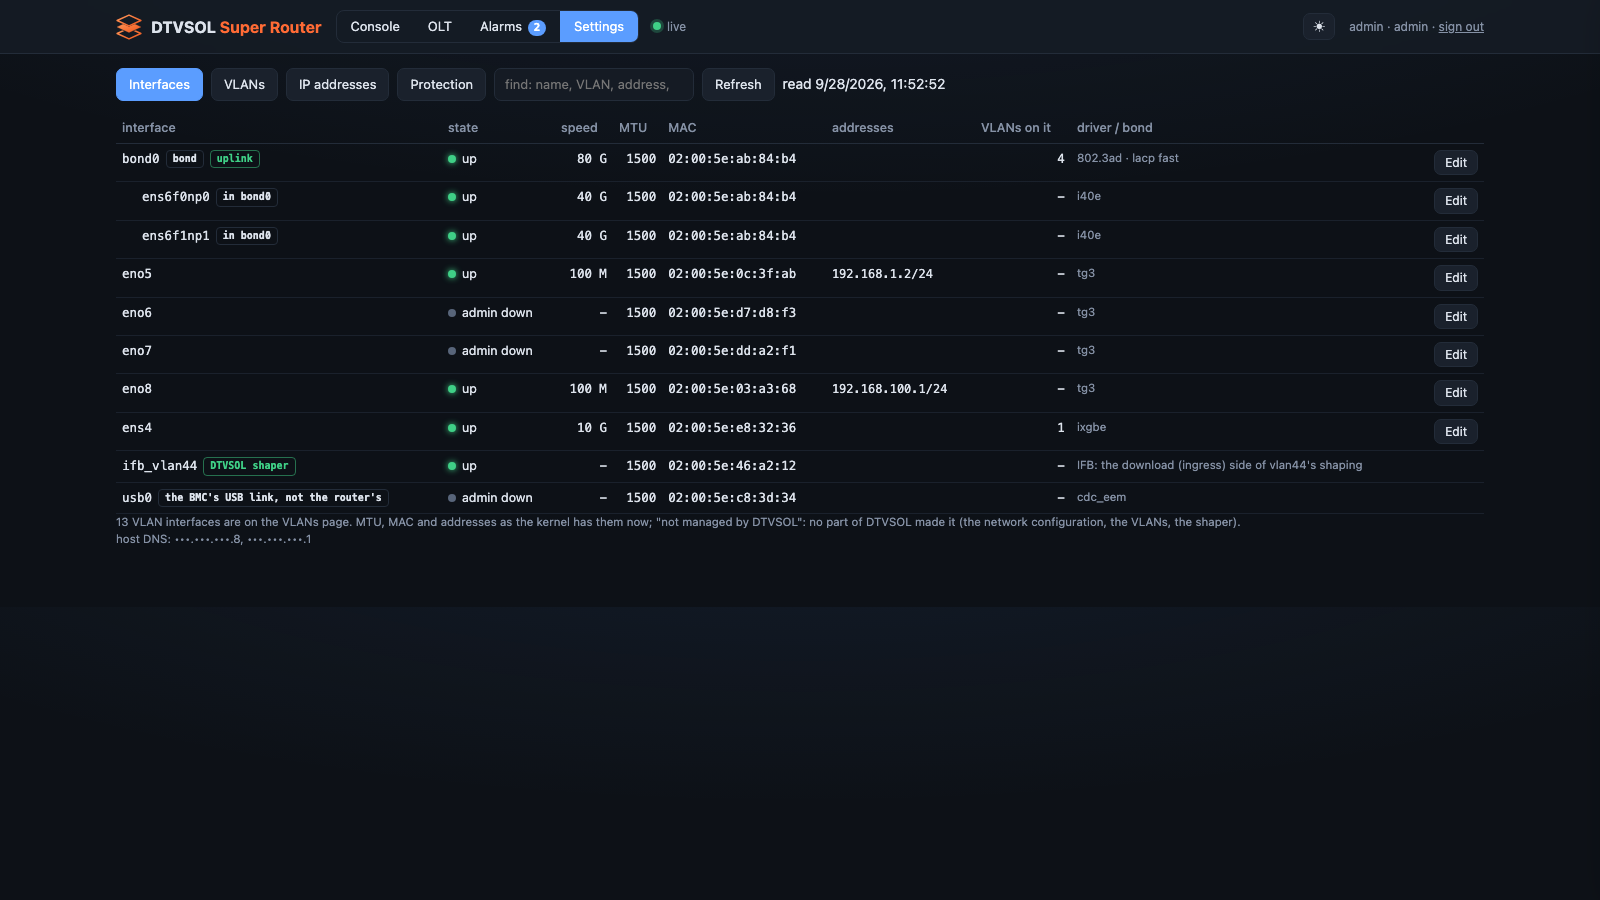
- Click a port or a bond and change it. For a port: enabled or disabled, MTU, or stop managing this port. For a bond: members, mode and parameters, MTU. Click Keep this change.
- The changes collect in a bar at the top: N interface(s) changed — not applied yet. Click Review and apply…
- The router shows what changes, what is refused, which addresses go, and the new netplan file. Nothing has been touched yet.
- Click Apply — rolls back in 120 s unless you confirm. The page may lose the router for a few seconds.
- Check that everything works, then click Confirm in the banner at the top of the Settings tab. Roll back now puts the old network back at once.
The monitor never forces a refused change. It refuses anything that takes away the address of your browser, an SSH session or the API. If you change the uplink, the page warns you that a wrong change cuts the router off.
Stop managing this port takes a port out of the configuration, so netplan leaves it alone (for example a link that is not the router’s). A bond member or a port with addresses cannot be released: take it out of the bond or delete its addresses first.
A BMC’s USB network link (often usb0) is shown as the BMC’s link and is never managed.
Every change made from the monitor is logged with the user’s name in
/opt/dtvsol/log/api.log.
When a change went wrong
Section titled “When a change went wrong”- Do nothing: after 120 seconds the previous network is back.
- From a console:
dtvsol netcfg rollback. - Older states:
dtvsol config versions, thendtvsol config restore <id> --yesanddtvsol netcfg apply.